
Saturday, March 31, 2012
dachshund origami
Friday, March 30, 2012
wrapping tissue paper yarn


Thursday, March 29, 2012
cut paper collage


 To make: coat both sides of mat board with gesso (omit if using pre-coated stretched canvas), let dry. Paint front of board with acrylic in background color of choice, let dry.
  |
| Prepare 1 sheet of paper to be cut by first folding it in half and then folding it in half again. |
 |
| Then fold the paper into a triangle along a line diagonal from corner to corner. |
 |
| Then fold the triangle in half |
 |
| Make a decorative cut through all layers of paper as shown |
 |
| Add cuts along edge |
 |
| Unfold and smooth out fold lines with a bone tool |
 |
| Add a layer of mod podge to the background board, lay paper on top and smooth down - starting in the middle and working out to edges. Cover with a light layer of mod podge. |
Wednesday, March 28, 2012

Tuesday, March 27, 2012
copper coiled drop pendant

 Made a little wire coiled pendant following the directions for "coiled drop earrings" in the book weave,wrap,coil by Jodi Bombardier. I used copper instead of sterling silver and a serpentine stone briolette instead of green amethyst. Personally I think its a bit big to be an earring which is why I'm using it as a pendant. Her directions were clear & easy to follow. I really like the idea of wrapping & coiling wire - I'm sure I'll be playing around with this some more at some point.
Monday, March 26, 2012
bread baked in a tube

 I purchased some Pampered Chefs bread tubes from a local thrift store awhile ago, never got around to using them since the instructions that came with them called for using pre-made refrigerated bread dough. Today I decided to give them a try using the bread recipe that came with my stand mixer - rapid mix cool rise white bread. I made the bread according to the recipe but after shaping the dough halves I split them into half once again (for a total of 4 small loaves), brushed them with olive oil and put each half into a tube (sprayed with cooking spray) and baked in a pre-heated oven at 375degrees for about 50 minutes.
Rapid Mix Cool Rise White Bread Recipe
(from : Instruction & recipe book for KitchenAid stand mixer)
Makes 4 bread tube loaves
Ingredients:
6 to 7 cups all-purpose flour
2 tablespoons sugar3-1/2 teaspoons salt
3 packages active dry yeast
1/4 cup butter or margarine - softened
2 cups very warm water (120 F to 130 F)
Place 5 1/2 cups flour, sugar, salt, yeast, and butter in mixer bowl. Attach bowl and dough hook to mixer. Turn to Speed 2 and mix about 20 seconds. Gradually add warm water and mix about 1 1/2 minutes longer.
Continuing on Speed 2, add remaining flour, 2 cups at a time, and mix about 2 minutes, or until dough clings to hook and cleans sides of bowl. Knead on Speed 2 about 2 minutes longer.
Cover dough with plastic wrap and a towel. Let rest 20 minutes.
Divide dough in half. Shape each half into a loaf as directed on page 66 (On a lightly floured surface, roll each half into a rectangle, approximately 9x14 inches. Starting at a short end, roll the dough tightly. Pinch to seal the seam. Pinch the ends and turn them under). Place in greased 8 x 4 x 2 inch baking pans. Brush each loaf with oil and cover loosely with plastic wrap. Refrigerate 2 to 12 hours.
When ready to bake, uncover dough carefully. Let stand at room temperature 10 minutes. Puncture any gas bubbles which may have formed. Bake at 400 F for 35 to 40 minutes. Remove from pans immediately and cool on wire racks.
Sunday, March 25, 2012
unraveled sweater
I spent the better part of this afternoon unraveling a sweater I bought at a thrift store for a few dollars. It was a slightly felted wool sweater or else it wouldn't have taken so long. I normally wouldn't have bothered with a felted sweater but its such a nice soft white wool. There are several good youtube videos showing how to do this if anyone is interested. The trickiest part usually is finding the starting points on the seams, for most of the sweaters I've taken apart the best place to start is the on the sleeve's cuff. This sweater resulted in about 475 grams of worsted weight yarn
 |
| the original sweater |
 |
| cutting the threads at the edge of a seam, once started the seam can be pulled apart or unzipped |
 |
| "unzipping" the seam |
 |
| the deconstructed sweater pieces |
 |
| unraveling the pieces & winding the yarn onto a niddy noddy |
 |
| the newly unraveled yarn :) |
Saturday, March 24, 2012
origami butterflies

I think these are the cutest butterflies I've folded yet. They do have a couple of cuts in them so maybe not the best for origami purists. I found the instructions in the book 'Origami Jewelry' by Ayako Brodek.
Friday, March 23, 2012
fabric thimble

Thursday, March 22, 2012
lip balm

HOW TO Make Your Own Lip Balm
Choose a container or tin for your lip balm. You can use an
empty Altoids tin or anything that will hold the balm.
Just be sure to wash it in hot soapy water and let it dry completely.
Prepare your ingredients. The general rule is two parts oil
to one part beeswax. You can use any oil that you like. Try adding almond oil
for added moisture or peppermint oil for a fresh scent.
Melt the beeswax in a double boiler, ensuring that the top
bowl does not touch the water. Once the wax melted, remove from the heat.
Immediately pour the hot mixture into the desired tin. Let it cool overnight before using it on your lips.
 For my lip balm I used 1 tablespoon beeswax pellets, 1 tablespoon olive oil and 1 tablespoon safflower oil
Wednesday, March 21, 2012
spinning yarn

Spinning yarn with "just" a spindle and some wool has been on my creative radar for awhile now. Trying to figure out how to do it from books just wasn't working for me. In February of this year I broke down and took a class. Thanks to Beth over at The Spinning Loft I am actually now making something that can pass for real yarn. My first spindle full of yarn I spun out of Falkland. I am thinking I will dye half of it and try plying 2 strands together.
For my second attempt I am using some "mixed wools, coopworth" (not sure exactly what that means) I purchased last Saturday at the Scrap Box in Ann Arbor. So far I am loving how this is spinning - it is either a perfect match for my spindle or I am actually getting a little better at this.
 I've been knitting for a number of years now and in retrospect I wish I had kept a record of all the projects I made over the years. Drawing on my experience from knitting I have started a spinning journal of the fibers/yarns I've spun.

 I've been knitting for a number of years now and in retrospect I wish I had kept a record of all the projects I made over the years. Drawing on my experience from knitting I have started a spinning journal of the fibers/yarns I've spun.
Tuesday, March 20, 2012
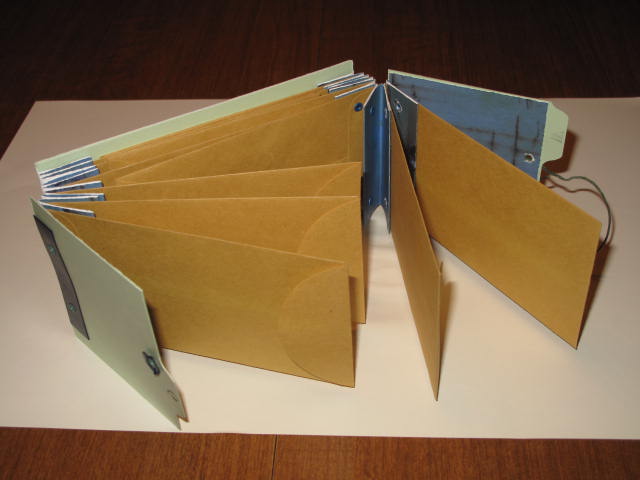
twelve-month organizer

 |
| nice book - lots of good projects & clear, easy to follow instructions |
 |
| my supplies |
 |
| inside of book |
Monday, March 19, 2012
dryer lint mâché 2


My finished dryer lint-mâché bowl - I painted the inside of the bowl with copper "liquid metal" acrylic paint (made by Sargent Art). Not sure if my photos are doing the bowl justice - it really looks nice in person.
Some other dryer lint mâché creations:
 |
| A glass jar covered with the lint paste and painted the outside red and the edges of the rim with the copper liquid metal paint. |
 |
| Blown-out eggs covered with the lint paste, the one on the left is painted with copper liquid metal paint and the one on the right is unpainted. |
Sunday, March 18, 2012
page-a-day origami 2
Still folding from my page-a-day origami calender. These are mostly functional folds.
 |
| coin purse (27 December 2010) |
 |
| memo holder (4 October 2010) |
 |
| coin purse (24 May 2010) |
 |
| betsy ross's star (2 July 2020) |
 |
| billfold (27 April 2010) |
 |
| instruction folder (15 September 2010) |
 |
| tote bag (6 August 2010) |
Subscribe to:
Posts (Atom)